Followers

Saturday, October 17, 2020

The Cooling off Season

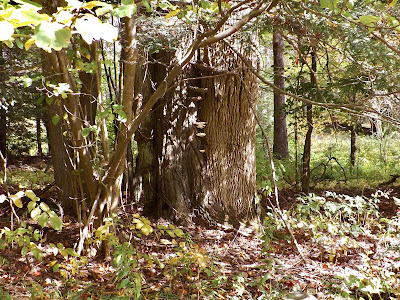
Every year at this time things change and they also stay the same. I'm referring to our view and the cabin. 

I took the last two photos yesterday
And...
Every year I  bake at least two apple pies. Today was the first of this season.
RECIPE:

Apple Pie

Ingredients:

Pastry for 2 crusts
8 cups sliced, peeled assorted baking apples - about 3 lbs.  (Granny Smith, Cortland, Jonathan)
2 Tablespoons lemon juice
3/4 cup white sugar
1/4 cup brown sugar (I use dark)
1/4 cup all-purpose flour
1 teaspoon ground cinnamon
1/4 teaspoon ground nutmeg
2 Tablespoons butter
1 egg yolk
1 Tablespoon milk

Directions:

1. In a large bowl, toss the sliced apples with lemon juice.

2. Combine sugars, flour, cinnamon and nutmeg; add to apples and toss well to coat.

3. Fill pastry lined 9 inch pie pan with apple mixture. Dot with butter.

4. Place second crust on top of pie filling, cut slits in top of crust to vent. Seal the edges of the crust with a fork or by hand.

5. In a small bowl, beat the egg yolk and milk. Brush mixture over top crust.

6. Bake at 425° for 15 minutes.

7. Reduce heat to 350° and bake 40-45 minutes more or until crust is golden and filling is bubbly.





Thursday, October 15, 2020

Finished Craft

Today I kept busy with household chores and even had time to finish my hoop project. Because I haven't been to a craft store in several years I resorted to what I had on hand. I really would have preferred to use much finer gold wire, but was lucky enough to have just enough of heaver gauge and used every inch! Seven metal rings were strung with beading thread. It is tough stuff and won't break, but flexible so the rings will swing. The silky colorful threads shine nicely in the sun and move gracefully. This was a fun project and I'm glad it's finished to my satisfaction.

please click on image to view larger


Tuesday, October 13, 2020

Crazy Crafting

A friend recently delivered craft materials to me knowing I'd either find a way to use them or find someone who would. Much of the cache was macrame cord of all colors and wooden beads of all sizes. I'm still working on ideas for those. What really peaked my interest were the three wooden embroidery hoops and two packages of threads - special threads! I scanned the packages before opening and utilizing this marvelous material!  No!  I am not going to embroider. Those days are gone. I'm creating and crafting now.

 
The first package was used first on my small hoop. I really wanted to fill the center with fine gold wire zig-zagged from pin to pin but I didn't have enough so I improvised with my crystal suncatcher that a granddaughter gave me. 
To view closer please click on image

It is really pretty when a soft breeze moves the fine threads!

The 2nd package was used on the large hoop. It is in the process of a similar, but very different creation.You'll have to wait for its viewing as it isn't yet complete. 

Please don't be shocked at my use of these very expensive threads. They were just laying around in their packages for a long time and now have been released for beauty in motion - at least to me! 


Monday, October 12, 2020

Butternut Squash Bread

RECIPE! Forgot about this one! 

  •  BUTTERNUT Squash Bread
  • 1 cup butternut squash purée
  • 2 eggs
  • 1/2 cup vegetable oil
  • 1/4 cup water
  • 1 cup white sugar
  • 1/2 cup brown sugar
  • 1 3/4 cups all-purpose flour
  • 1 teaspoons baking soda
  • 1/2 teaspoon kosher salt
  • 2 teaspoons ground cinnamon
  • 1/2 teaspoon ground nutmeg
  • 1/2 teaspoon ground cloves

DIRECTIONS:

  • Preheat oven to 350°F. Grease and flour one 8.5 x 4.5 x 2.5 inch loaf pan.

  • In a large bowl, mix together the butternut squash purée, eggs, oil, water and sugars until thoroughly combined. In a separate bowl, whisk together the flour, baking soda, salt, cinnamon, nutmeg and cloves.

  • Stir the dry ingredients into the butternut squash mixture. Combine just until incorporated; do not over mix. Pour into the prepared pan.

  • Bake for 55-65 minutes or until a wooden skewer inserted into the center of the loaf comes out clean.
  • Add ground walnuts or raisins if you wish.

Autumn Colored Vegetable

Processing Butternut Squash doesn't seem to be as easy as I remember. Perhaps it is because I'm weaker and have less energy. Perhaps I should have undertaken this project before I worked on a craft and then processed whole beets. Anyway, the end result is very rewarding. The hardest part (for me) was slicing the squash lengthwise. I had to ask the Mister to assist in this operation. From then on, it was all in my ballpark. As the squash is cooling down, waiting to be pureed and then stored in two 3.2 cup containers, here I am, wanting to encourage readers who haven't ever done this before to do so - at least once in their lifetime. Winter squash are usually plentiful and really good for you. I haven't added a thing - yet - because I'm not sure how I'll prepare this but am confident it will be great. In case you might try it soon, here is my recipe below the images.

After scooping from baked halves
Waiting to be pureed and stored

RECIPE

INGREDIENTS

  • 1 medium to large butternut squash
  • 3–4 tablespoons extra-virgin olive oil
  • Generous sprinkle of salt and pepper
  • About 1/4 cup water

INSTRUCTIONS

  1. Line a rimmed baking sheet with parchment paper or tin foil and preheat the oven to 375 degrees.
  2. Rinse off the outside of your squash and then cut it in half from top to bottom. Scoop out the seeds.
  3. Drizzle the inside of both pieces of squash with olive oil and give it a generous sprinkle of salt and pepper.
  4. Place the squash on the prepared pan, cut side down, and add the water to the bottom of the pan. (Just pour it around the squash). Place in the hot oven.
  5. Roast for 40-50 minutes until the squash is easily pierced with a fork or the tip of a knife.
  6. Remove from the oven, allow to cool slightly, then scoop flesh from the skin.
  7. You can serve the squash as is, scooped straight from the skin with a little salt to taste. You can add it to a bowl and mash it with a little butter and a bit of brown sugar, or you can use it like you would any potato, sweet potato, or pumpkin in recipes.


Saturday, October 10, 2020

Beet Repeat

Made them again! the link below is all about this activity and you may review it by clicking on the link below.

Pickled beets and eggs 


The Beet Biter

Friday, October 9, 2020

Nostalgia - Wheels for My Shoes

Back in the 1940's I have clear memories of sidewalk roller skating in the summertime. Of course it was ice skating in the winter. I saw on the news today that this is the National Rollerskating Month. OK, here's my story.  

The very rural neighborhood sidewalks from the end of my block to the beginning were concrete slabs with small spaces between each one. Some were cracked from weather upheavals as well. My dad was always killing off the grass that wanted to grow there. I remember sitting on the warm ones in the summertime poking at the anthills and watching the ants surface and scatter. Those were the days when kids amused themselves. The sidewalks were wonderful places to skate and chalk in hop scotch marks and play with the other neighborhood kids. We all had roller skates. Our mothers all had iodine and bandaids handy to patch up our scraped knees and elbows. Even though the skates were "primitive" in today's world, they were the latest in yesterday's. There were clamps that could be tightened or loosened at the sole edge of the toe of our shoes using our precious keys. The keys were strung with shoelaces or ropes and hung around our necks so we wouldn't lose them.

please note all images are from the internet
Leather straps were buckled around our ankles to hold the heels in place. I remember my dad put sheepskin pieces under mine to help diminish the rub of the buckles and friction of the straps. The length was adjustable by loosening the nut on the bottom and then being able to stretch out the entire skate to match the size of the shoe. When that was accomplished the nut was tightened. (I remember I had wing nuts, not plain ones so it was easier for me to adjust the skate length because they were shared with my brother.) I "think" (lost this part of memory) we oiled the bearings in the wheels with Singer's sewing machine oil. Anyway we had to keep the wheel bearings clean - maybe it was graphite powder.

As years went by, my block friends and I moved up to rink skating and parents would take turns delivering us to the nearby arena and then picking us up after closing time. That was in the early 1950's. The arena had a lady in the balcony actually playing a large organ for the music the entire time and she even took requests! We had "special" short skirts and underpants for spins and we had pom poms and "stops" on the toes of our rink skates. Girls had white skates. We carried them in a box with stickers pasted all over for decoration. 
please click on image to view larger
Sometimes it's good to look back. Sometimes it's not. This was a good time. 


Tuesday, October 6, 2020

Back in the Kitchen

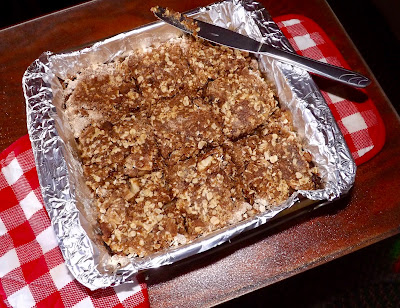
I had to get my gumption up today and do something productive so preparing a treat was the choice. This is an easy recipe. I have one that produces a much larger and richer version, but we don't need to have such a goodie so close at hand! I shall share both here.

please click on image to view larger

RECIPES
(Missy is one of my daughters)
This is from my high school girlfriend's mother(1952)


Friday, October 2, 2020

Playtime with Flutter

The leaf butterfly craft is now hanging on the front porch. I took her photo before moving her and then proceeded to photomanipulate my photo. Here are my results. 


As soon as I made the one below here, I knew it was time to quit. I was getting carried away!! It happens!!
(click on image to view larger)


Thursday, October 1, 2020

Conefly

My leaf craft is finished! I'll hang it by the front door entrance. The leaves are preserved but still fragile.  

Her name is "Flutter." 

Please click on image to experience her true beauty.

Tuesday, September 29, 2020

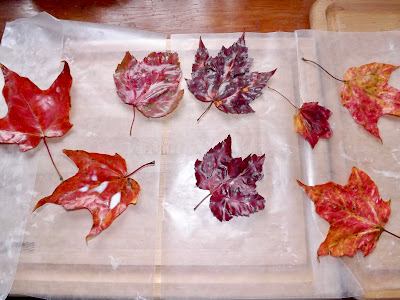
Elmer'd Leaves

One side almost dry and the backside to do. I apply with my fingers, liking the feeling. In my head a plan is forming of how I'm going to use these. It's probably a good thing that I don't have a "workroom" because there would be dozens more on the counter. No crafting tomorrow. It's laundry day and that trip and operation wears me out. After that I might be ready to play with leaves again. Bear with me. (Nope! I don't want yellow ones - only red will do.)

please click on image to view larger


Monday, September 28, 2020

Autumn Awe

My ride today was a short one and I brought home some of the red maple leaves for a craft project. They are drying now after being washed from road muck. There were millions of them down already so I had a choice of the ones that pleased my eye. The hard part was to keep them from blowing out of the cubby as I didn't bring a container. Here are a few of the shots I took on this ride.

please click on image for more detail